 |
 |
 |
| Nose Cone, Jig, and Hub | Hub on Nose Cone | Jig, providing Hub Alignment |
Greg Ordy
The Estes Cosmic Cobra was introduced in the spring of 2002. My friend Paul's son, Andrew, received and built the kit right after it became available. We already had some experience with helicopter recovery through the Estes SkyWinder. The Cosmic Cobra advertised a form of helicopter recovery, and it was an $8.00 ($7.99 USD, Hobby Town USA, July 2002) kit. It seemed too good to be true - helicopter recovery and low cost. The nose cone is directly connected to three plastic blades. When ejected from the rocket, the blades are pulled open by rubber bands. The blades and the nose cone spin like a helicopter, and they drift slowly down to the ground. The rest of the rocket returns by parachute.
We finally got together for a launch, and the Cosmic Cobra made several fights. The nose cone/blades assembly was quite interesting to watch in flight. We saw it descend with the nose cone pointing down (the expected position) as well as up. At one point, the nose cone was traveling horizontally along the ground for a short distance. For the price, a very interesting and different kit.
The difficulty with the kit was getting it ready for flight. When the three blades are inserted into the body tube, they tend to run into the shock cord, which is used to attach a parachute to the bottom section of the rocket. In addition, the plastic hub which holds the three blades must be carefully glued to the back of the nose cone. This hub is nearly the inside diameter of the body tube. If the hub is even slightly off-center, the nose cone will bind as it enters the top of the body tube. In the worst case, it would be impossible to seat the nose cone. In our case, it was just a very snug fit.
Since the kit was so much fun, we decided to pick up another. With the pieces in front of us, we noticed that the hub made a very imprecise fit over the end of the nose cone. In fact, Andrew did a very good job of gluing it on straight. Still, the nose cone was not in perfect alignment with the blade mounting hub. After a few minutes of head scratching we came up with a good solution for the alignment problem.
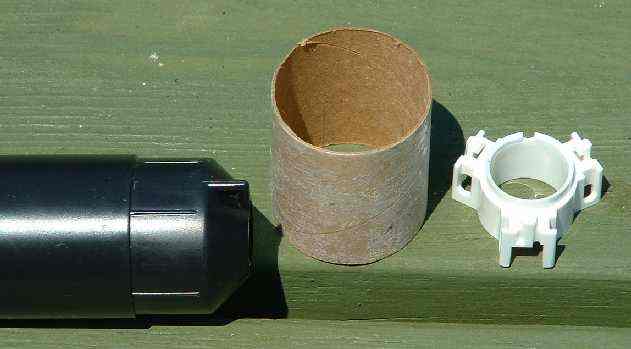
Ok, calling a 1.5" length of BT-55 a hub alignment jig is a little over the top. Still, that's what it was in this case. What you need to be able to do is to exactly align the hub over the end of the nose cone while the glue (plastic cement) dries. We went to the parts box and cut a 1.5" length of BT-55 tube. The following pictures show the parts involved. Please click on a picture for a larger view.
|
|
|
|
| Nose Cone, Jig, and Hub | Hub on Nose Cone | Jig, providing Hub Alignment |
The left picture shows the nose cone, BT-55 section, and hub. The middle picture shows the problem. The white hub must be centered on the black nose code. It's outer edges are like the shoulder of the nose cone, they fit into the body tube with very little clearance. Sadly, the hub can slide all over the top of the nose cone - the correct position is not obvious. Even small alignment errors will lead to binding.
In the right picture, the BT-55 has been placed over the nose cone, providing a jig for the hub. The end of the hub was coated with glue, and placed upon the end of the nose cone. The BT-55 held it in alignment until the glue dried. The resulting assembly slides very easily into the end of the rocket.
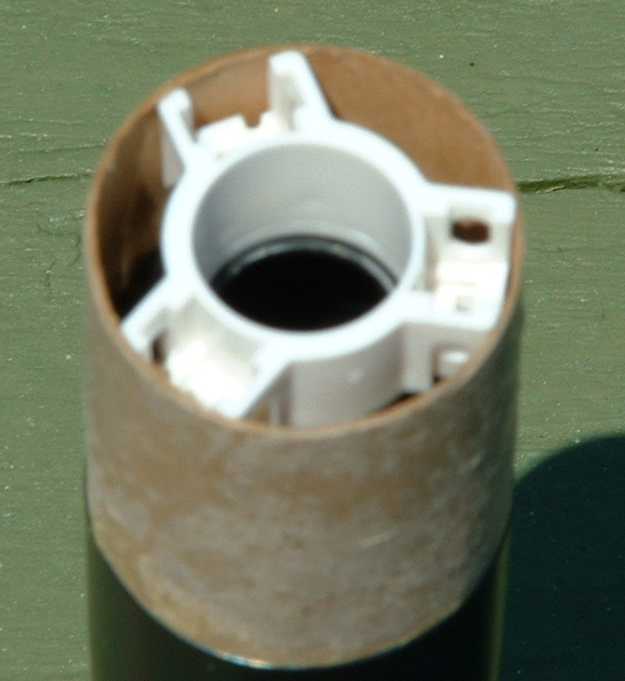
On the second kit, the shock cord was mounted on the opposite end of the body tube - near the plastic fins. This was so that nothing would be near the hub/blade area, which is already busy and congested. Paul did use special Kevlar string for a portion of the shock cord. This is a good choice since it is heat resistant. The entire parachute and shock cord can now be tucked way down into the body tube, beneath the blades. My own opinion is that the body tube should be a little longer to provide more room. The blades take up most of the body tube length.
With these two modifications, the Cosmic Cobra was much easier to prep and fly. It's a fun kit, and worth it just for the parts, if nothing else. The yellow body tube and plastic fins and nose cone are becoming standard on a number of Estes kits. For $8.00 you get all of that, plus the blades and a parachute.
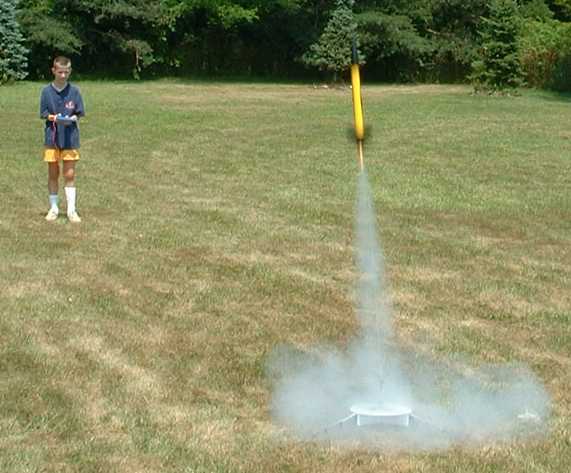
Here is a picture of Andrew launching his Cosmic Cobra. Please click on the picture for a larger view.
 |
| Cosmic Cobra Launch |